Need to Reorganize Excel Data?
QI Macros Makes it Easy to Stack & Unstack Data in Excel
You can find the restacking and unstacking tools in the Restacking section of the QI Macros menu:
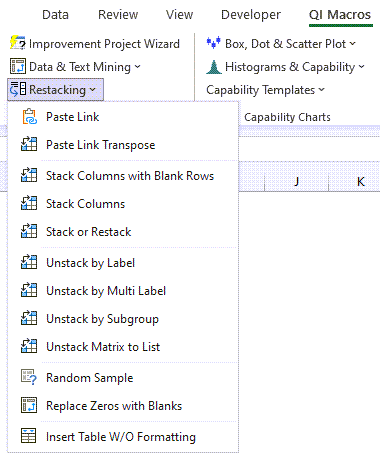
To use the restacking and unstacking tools:
- Click and drag over your data to select it.
- Click on QI Macros menu and select the restack/unstack function you want.
- Answer the prompts and QI Macros will reorganize your data for you.
Stack Columns with Blank Rows
If you have multiple columns of data and would like to stack your data into a single column, use this tool. It will automatically place a blank row between your different data sets!
NOTE: Included in the January 2021 release, this functionality is utilized if an end user has multiple columns in their data set and chooses to create a single-column Variable Control Chart (e.g. XmR Chart).
Data Before
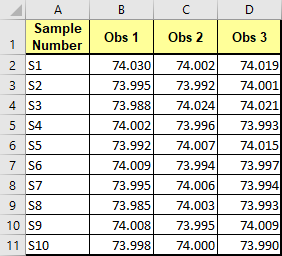
Data After

Stack Data by Columns
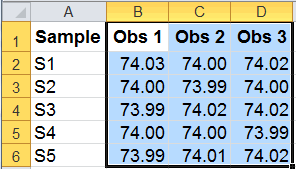
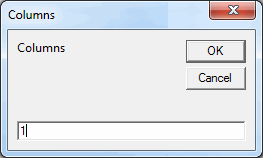
Sometimes you need to stack several columns of data into fewer columns or even into one column. QI Macros will prompt you for how many columns of data you want to end up with. In this example, we chose "1". QI Macros leaves the original data and makes a copy into the new format:
Data Before
Prompt
Data After
Stack or Restack (e.g., from 6x6 to 3x12)
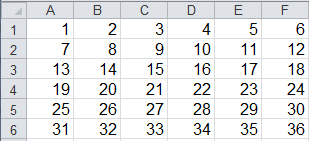
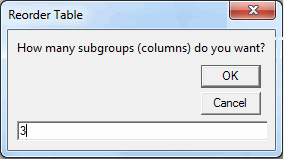
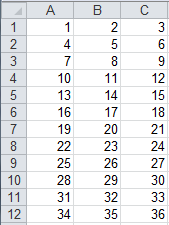
Stack or Restack takes any size table and switches the data into as many columns as you choose. You can increase or decrease the number of columns:
Data Before 6x6 Table
Prompt
Data After 3x12 Table
Unstack by Label
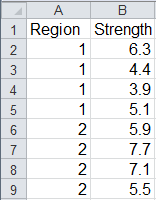
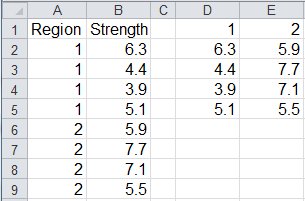
Unstack by Label takes any size table and unstacks it based on the labels in column A:
Data Before
Data After
Unstack by Multi Label
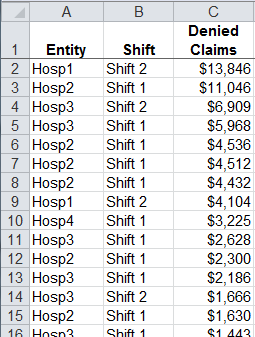
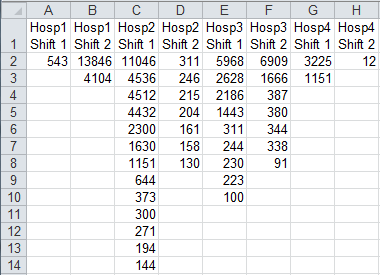
This functionality is designed to take a column of data that has multiple labels (e.g., entity and shift) and group it into columns for each label combination (e.g., entity - shift):
Data Before
Data After
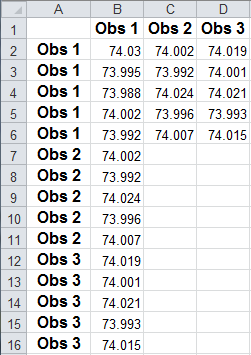
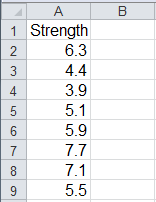
Unstack by Subgroup
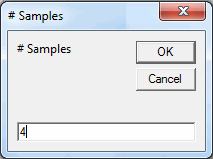
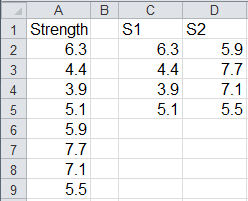
Using any number of columns, Unstack by Subgroup will use the number of samples per subgroup (in this case 4) and unstack the data. This function is generally used to go from one column to many:
Data Before
Prompt
Data After
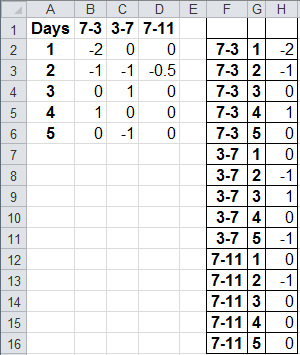
Unstack Matrix to List
This functionality is designed to take a group of multi-column data that has multiple labels and groups them into a single-column list of data:
NOTE: Included in the April 2020 release, the Unstack Matrix is now able to process zeroes within your data set.
Data Before
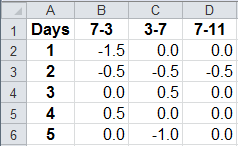
Data After
Generate a Random Sample
This functionality is designed to take either a single or multi-column set of data and put it into random order, depending on the number of samples you would like to randomize.
To do so, simply highlight your data:
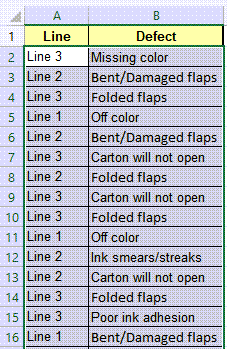
Select "Random Sample" from the "Restacking" menu -
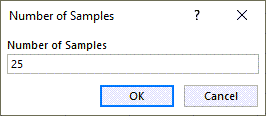
Input the "Number of Samples" you would like to randomize:
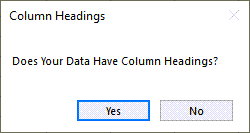
Do you have any headers in your data set?
(NOTE: You do NOT need to include headers in your data set):
You will then be provided with a randomized set of data based upon the number of samples you chose to generate.
One example of how this tool could be used, is if you have a large set of data and want to create a Pareto Chart.
Instead of creating a Pareto out of the ENTIRE data set (e.g., 500,000 rows), you could generate a random sample out of 100 of those points and THEN create your Pareto.
NOTE: This functionality is included in the October 2022 release.
Replace Zeros with Blanks
This functionality is designed to analyze your data set and remove any zeros and/or decimal zeros, replacing them with blank cells, instead. This should be used if you do not want zeros to be calculated within your data set, because Excel treats zeros as data points - not as blanks.
To use this macro, simply highlight your data:
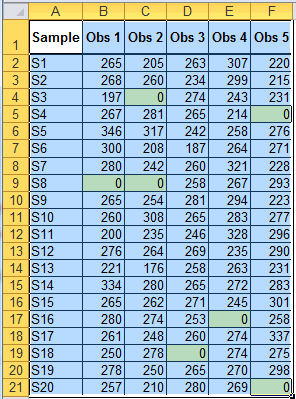
Select "Replace Zeros with Blanks" from the "Restacking" menu -
The zeros in your data set will be turned into blank cells:
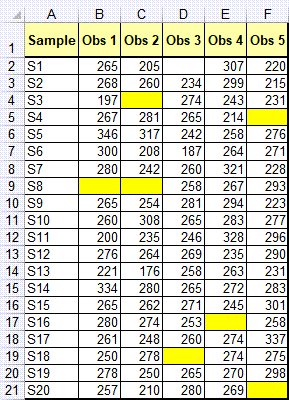
NOTE: This functionality is included in the January 2023 release.
Insert Table without Formatting
When inputting a table into an Excel spreadsheet or template, Microsoft Office automatically removes all previous formatting from your spreadsheet and inputs Excel's default formatting instead.
This tool, allows the end user to insert a table into their Excel spreadsheet without their formatting changing!
To use this macro, simply highlight your table range:
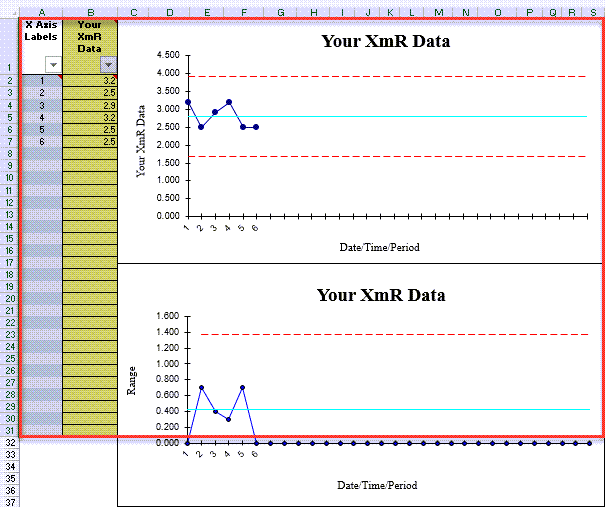
And select "Insert Table W/O Formatting" from the "Restacking" menu -
A table is now inserted in your spreadsheet:
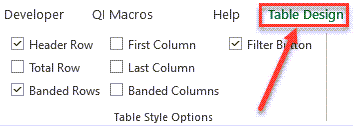
NOTE: This functionality is included in the October 2023 release.

